
Public clouds are secure by default… but not necessarily in your case
Is it true that the public cloud is not secure by default? In this article, we will discuss the security of individual public cloud services considering the broader context.


Public clouds are secure by default… but not necessarily in your case
There is no doubt that cloud computing has been one of the most groundbreaking changes of the last decade. It has become a significant part of many companies’ strategies by providing flexibility and scalability that would be difficult for a single organization to achieve on its own. This shift has given us an opportunity for a fresh start – we can learn from the mistakes made in the days before public clouds and establish better security baselines for the future. According to a Statista report from 2024, respondents admitted to running their most significant workloads on AWS (49%), Azure (45%), or Google Cloud (29%)1. Unfortunately, mistakes from the past are still being repeated today. A Gartner report shows that through 2025, 90% of organizations using public clouds will inappropriately share sensitive data, and 99% of cloud security failures will be the customer’s fault2. I don’t know about you, but I had two questions after reading this:
- How is it possible that only 1% of cloud security failures will be the CSPs’ fault?
- Can I trust that the services I use are secure by default?
Connect with the co-authors on LinkedIn!

Context is key for public clouds security
To find the best possible answer, we need context that includes factors like time, use cases, scale, and more. Without the proper context, following any security baseline or standard can become a frustrating journey of trying to meet requirements that make no sense in your case.
Time
There is a relatively small chance that someone will find the IP address of your instance, with a remote management port open, just five minutes after it is provisioned. But the odds increase over time. The public IP address range of Azure or other public cloud providers are no secret, meaning that there is a chance that someone could stumble upon your machine by accident.
In the case of storage services, the longer you use them, the greater the odds are that the access key will leak if you do not handle them securely. Another factor to consider: When did you create your resources? The configurations described in this article may be significantly different from the default settings used a few years ago. Maybe it is time to check the configuration of all your resources and ensure they follow the same baseline?
Use case
If you need storage for files that do not contain any sensitive information, you should be good to go with the default configuration. However, the same resource should not be used for processing medical data or storing database backups containing your clients’ financial information. In more sensitive situations, consider disabling public access completely and switching to communication only via private endpoints. If you need a small virtual machine for testing purposes – and it is not a part of a virtual network connected to your on-premises infrastructure via site-to-site tunnel – then assigning a public IP and connecting via a remote management port should be totally fine.
Organization scale
Is your company small, or does it employ thousands of people worldwide? Does it operate in a single country, or do remote locations in other countries have access to your infrastructure? How big is the team responsible for managing your cloud infrastructure? How many of those people have broad permissions that could turn your environment upside down? Do you know what changes are made in your setup on a daily basis? How many users access your software? The larger the scale, the more likely it is that your infrastructure will attract unwanted attention.
What you see depends on where you stand
In the next part of this article, we will examine two perspectives: a single developer creating a new web application for recipe sharing and a big financial company that must comply with strict regulations. Comparing these two perspectives may seem strange, but it helps highlight the differences in challenges faced in each case. I intentionally chose a financial company since it operates in one of the most highly regulated industries. This article will give you a complete comparison of the default configurations of the two most popular cloud services – Virtual Machines (VMs) and Storage Buckets – across three major cloud providers: Azure, AWS, and Google Cloud. All resources will be created either via the web portal or the CLI, and we will focus on network access and configuration.
Cloud virtual machine
Azure Virtual Machine
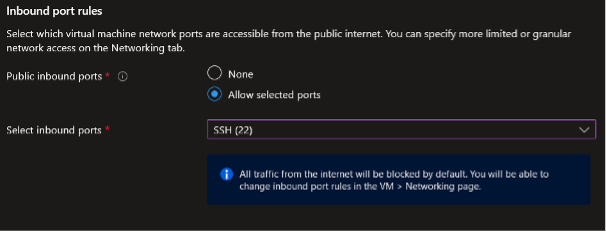
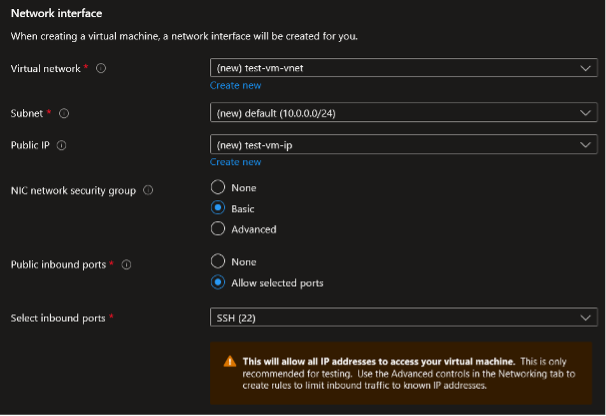
During the VM creation process, you can choose which inbound ports will be allowed for public communication. By default, your new VM will have a new public IP address assigned, allowing you to connect to it from outside the virtual network. Depending on the selected operating system, either the SSH or RDP port will be suggested.
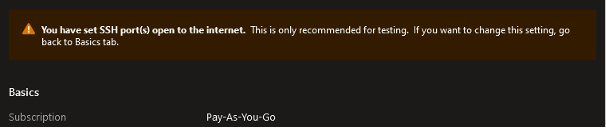
Do not believe the message claiming that your VM will not be accessible from the Internet. The truth is that, in the default scenario, your VM will be accessible on the port you define. This information is displayed in the Networking tab and in the final step of the virtual machine provisioning process.
To create a new virtual machine via Azure CLI, only two parameters are required: name and resource-group. The rest is completely optional — except for an admin password, which is required if the VM runs Windows OS. Let’s assume that we need a VM in a specific region and of a specific size:
az vm create --resource-group RG-VMs-test --name evoo7x837i --size Standard_B1s --location westeuropeWith the command above, we get a Windows Server VM with a public IP and RDP port open to communication from any source. There are not too many differences between this and the portal-based configuration.
Result
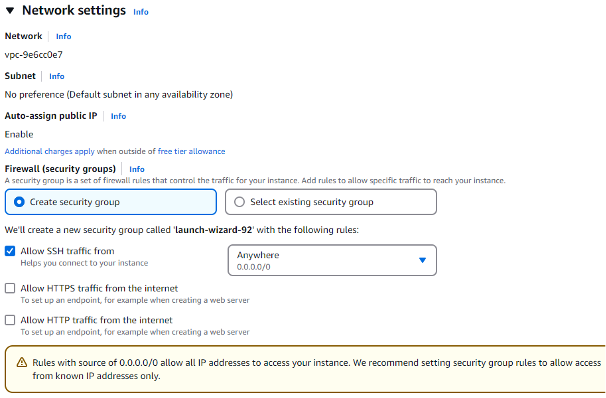
We have created a virtual machine with a specific public IP assigned. We can check the current inbound and outbound rules in the Network settings:
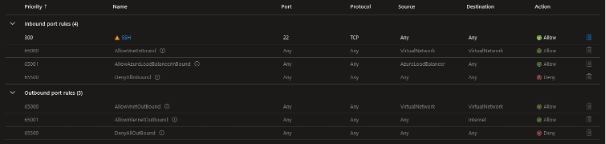
The port selected during VM provisioning has been added as a rule, allowing us to connect to the machine from any source. Assuming this VM was added to a new virtual network with no other available resources, the only one way to access it is VM and it is via the public IP assigned during the provisioning.
AWS EC2
By default, your new EC2 instance is assigned a public IP address, allowing remote connections from the Internet. Also, the remote management port (such as SSH or RDP) is open to incoming connections from any source, and AWS will notify you about this:
To create a new EC2 instance, you can use the following command:
aws ec2 run-instances --region eu-north-1 --instance-type t3.micro --image-id ami-087fba4aa07ebd20fAs a result, a new EC2 instance is created with a public IP address assigned. However, by default, it is not publicly accessible. In my case, it was assigned to a VPC with no rules allowing traffic, except for traffic originating from the same VPC:
[...]
"PrivateIpAddresses": [
{
"Association": {
"IpOwnerId": "amazon",
"PublicDnsName": "ec2-13-48-10-125.eu-north-1.compute.amazonaws.com",
"PublicIp": "13.48.10.125"
},
[...]

Result
Depending on whether you use the web console or CLI, you will have a new EC2 instance with a public IP address assigned with none or at least one port open (SSH or RDP) for inbound connections from any source.
Google Cloud Compute Engine
By default, Google Cloud’s Compute Engine is created with an ephemeral external IP address and is subject to default firewall rules, which allow incoming SSH and RDP traffic. All the above-mentioned settings are configured in the Networking section of the new VMs creator:
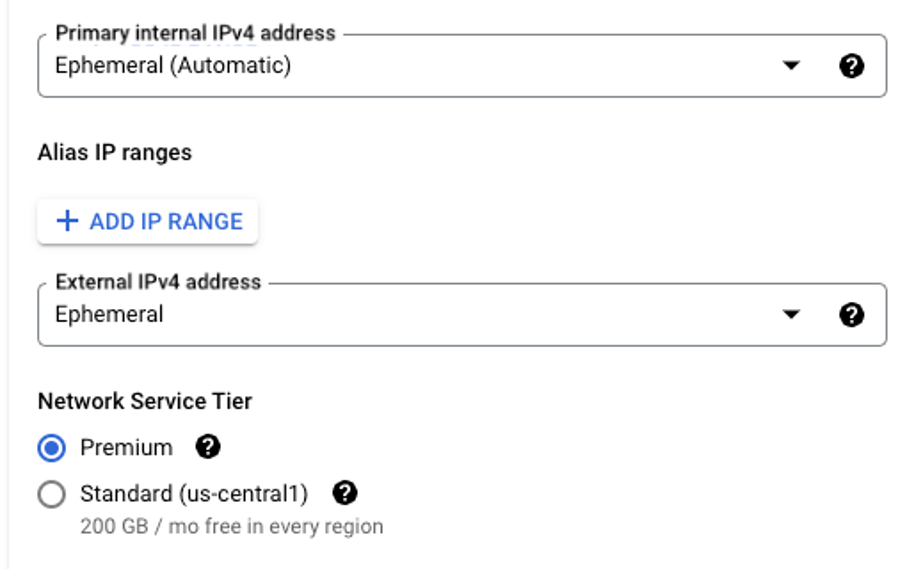
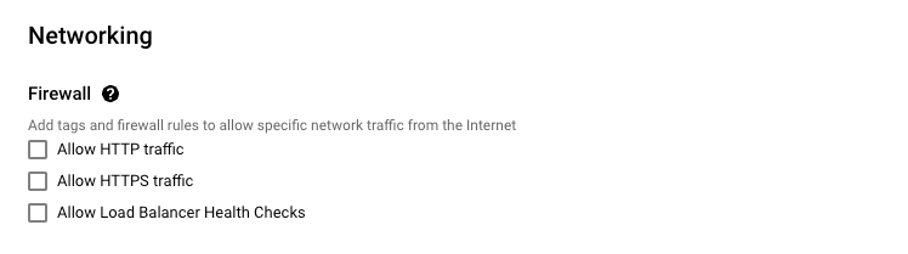
Note that, by default, HTTP and HTTPs connections are blocked. It is also worth mentioning, that Compute Engines are operated by the default Compute Engine Service Accounts, which is not a secure configuration and may lead to privilege escalation scenarios.
Creating a new Compute Engine instance using the CLI can be as simple as the following one-liner:
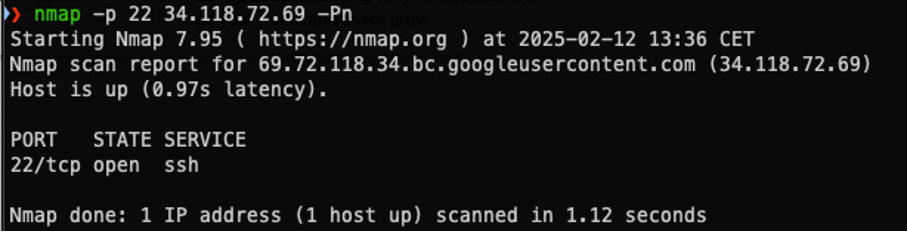
gcloud compute instances create test-instance --zone europe-central2-aThe only required parameters for the compute instance create command are its name and the zone where the machine will be hosted. The output of the command, presented below, instantly proves that an external IP has been assigned, making the VM accessible from the Internet:

Result
Both the CLI and web console prioritize simplicity and usability, allowing users to create VMs quickly with minimal configuration. Of course, advanced users can go deeper into this process and configure their machines the way they like. However, by default, machines are assigned with a public ephemeral IP address, which is accessible over SSH and RDP protocols.
Single developer point of view
At this point, you are good to go. Of course, if you want to ensure that your machine is secure, you can add some more adjustments:
- Make sure the password for your local user accounts is strong and not something that appears on commonly used password lists.
- If you can use a static IP – restrict access to your machine from IPs different than yours.
- Ensure that your OS and remote management services are up to date and free from known vulnerabilities.
Big financial company point of view
In your case, the journey is just the beginning. If you work for a big company, you likely have to meet regulatory requirements, like PCI DSS. No matter what type of data you process, securing your systems is not just a legal obligation but also a way to keep your clients’ trust and avoid financial or legal losses.
From a network access perspective, you should make sure there is no direct access from the Internet (i.e., from sources like ‘any’, 0.0.0.0 or ::/0) to any management ports (22, 3389). The best move is to unassign the public IP address from your machine and allow access only via a private network. Additionally:
- make sure that it is not possible to download the storage volume assigned to your machine:
- in Azure, disable public access to managed disks;
- in AWS, verify that the default setting to block public access has not been modified.
- Restrict all network traffic unless it is explicitly allowed — even within private networks – to prevent unsolicited traffic.
Sounds like a lot of work just for a single resource, right? And that was only a part of networking. There are many more requirements in other areas that differ from the defaults.
To make your job easier:
- define a strong security baseline
- use automation for provisioning your resources
- enforce specific configuration using tools like Azure Policy, AWS Config, or Google Cloud’s Organization Policies.
Cloud Storage
Azure Blob Storage
When creating a new Storage account, you will be asked to provide a name for it:

Remember that this name will be used as a subdomain in URLs that you can send HTTP requests to, such as:
https://0v0mxassui.blob.core.windows.net

Try to avoid any simple combinations or dictionary words:

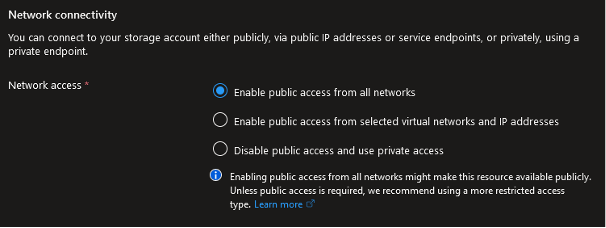
And remember – your new storage account will be publicly accessible from any network by default:
Let’s create Blob Storage using Azure CLI. Only two parameters are required to create a new resource: name and resource-group. We will also add sku and location to the final command:
az storage account create --name xa5izz5vrd --location westeurope --resource-group RG_SA_test --sku Standard_LRSPay close attention because there are two important differences between the result of creating a resource via the portal and via the CLI:
[…]
"location": "westeurope",
"minimumTlsVersion": "TLS1_0",
"name": "xa5izz5vrd",
[…]
"provisioningState": "Succeeded",
"publicNetworkAccess": null,
"resourceGroup": "RG_SA_test",
[…]
The first difference is that the minimum TLS version will be set to 1.0. Also, the public network access setting will be set to null. This means that the Storage Account will go to default and public access will be enabled.
Result
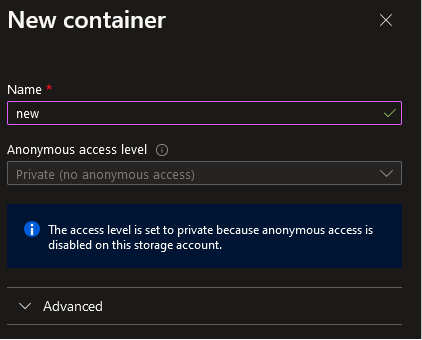
You have created a new storage account that is publicly available. You can start uploading data right away. In the Storage Browser, you will notice there is one container with anonymous access level set to Private. It means that even though your resource is publicly accessible, you will not be able to read any data from any container without proper authorization (such as a SAS token, shared access key, or user account with necessary permission). If you create a new container, it will also be set up this way by default:
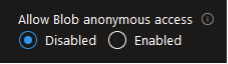
Also, you will not be able to change the access level unless you enable anonymous blob access in the resource’s settings:
At this point, any malicious user, trying to access your Blob Storage from the Internet, will be blocked.
AWS S3
The first step is to provide a bucket name:

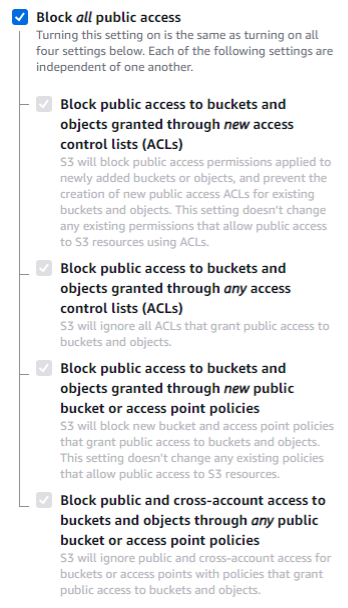
Also, by default, no public access is allowed.
Now let’s switch to the CLI and create a new S3 bucket. It is as simple as providing a command with only one parameter required – bucket, which is the name of the resource.
aws s3api create-bucket --bucket ztfgfz2zu4
{
    "Location": "/ztfgfz2zu4"
}
The resulting bucket configuration is the same as in the case of a resource created from management console, including disabled public access:
aws s3api get-public-access-block --bucket ztfgfz2zu4
{
    "PublicAccessBlockConfiguration": {
        "BlockPublicAcls": true,
        "IgnorePublicAcls": true,
        "BlockPublicPolicy": true,
        "RestrictPublicBuckets": true
    }
}
Google Cloud Storage Bucket
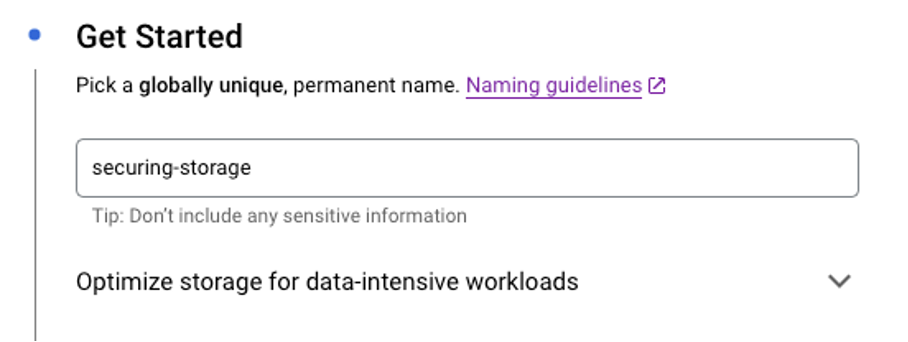
At the first step of creating a Cloud Storage Bucket, the user is asked to provide a globally unique and permanent name. This step is important, and it is advised to avoid easily guessable names— though it is not enforced. For the sake of demonstration, a bucket named securing-storage was created. It is worth mentioning that the UX provides a tip to avoid including sensitive data in the bucket name — how insightful of Google 😊
In the third step of the process, the user can choose whether the bucket should be publicly accessible. By default, the setting “Enforce public access prevention on this bucket” is turned on:
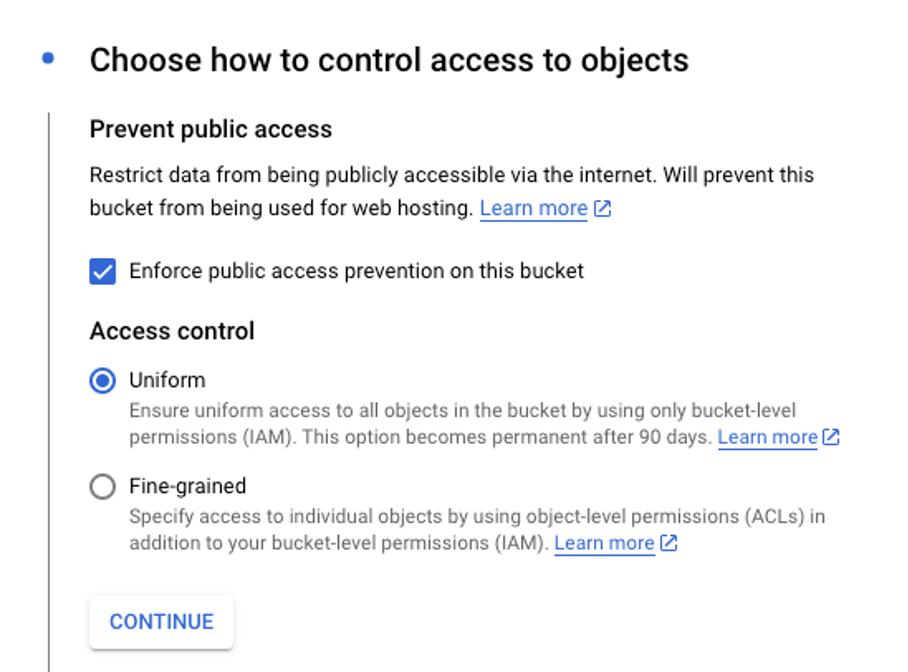
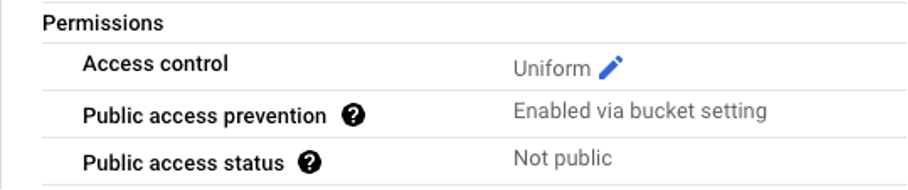
Another helpful insight is that this setting will prevent the bucket from being used for web hosting. Also, it is worth mentioning that Google implements two access control approaches: Uniform and Fine-grained. The default selection is Uniform, which allows to manage data access globally at the bucket level. Fine-grained, on the other hand, allows to specifically manage access to particular bucket objects using ACLs. Below is a summary of public access settings listed in the UX:
Creating a new Cloud Storage Bucket instance using the CLI can be as simple as the following one-liner:
gcloud storage buckets create gs://securing-storage --location=us-east1The only required parameters for the storage buckets create command are its name provided as an URL in gs:// scheme and its intended location. This is where the fun part begins – the default configuration of the Cloud Storage bucket is completely different from the one created using the web console, as presented below:

It turns out, that buckets created using the CLI, use Fine-grained access control by default, and public access prevention is not enforced. Does this mean that all objects in this bucket can be accessed publicly? Fortunately, no. All objects are subject to ACLs rules, which by default do not allow public access. In order to allow such access, the cloud admin must explicitly grant permissions to one of the following public principals: allUsers or allAuthenticatedUsers.
Result
The default settings for new Google Cloud buckets vary depending on the method of creation. When using web console, Public access prevention is enabled by default. In the case of CLI-created buckets, access controls are based on ACLs, which do not grant access objects permissions to public principals.
However, it is important to understand the difference between those two access control approaches and use them accordingly.
Single developer point of view
If you’re building a simple recipe-sharing app, you’ll likely need cloud storage to host static images or files that will be shared or displayed in the app. In the default configuration for Azure and AWS, there is nothing to change – its current security level is enough for you. However, for Google Cloud, you will need to explicitly grant public access to objects hosted on the Cloud Storage.
Big financial company point of view
Once again, you are facing a challenge since the default configuration of the new resource must be adjusted to meet regulatory requirements.
- First, restrict network access to your storage. It should only be accessible from specific public IPs or virtual networks.
- Second, make sure that encrypted connections are enforced to protect data in transit. By default, Azure Storage Account and Google Cloud Storage have it enabled. In AWS S3, you must allow only encrypted connections using the aws:SecureTransport condition in your bucket policy.
- As with other cases, you can enforce and track configuration changes using Azure Policy or AWS Config to make sure that nothing will deviate from this baseline. In the case of Google Cloud, it is advised to create OrganizationPolicies that restrict the usage of Cloud Storage resources according to the needs and regulations.
Summary
As you have seen, a default configuration that might be suitable for a solo developer building a simple web app won’tmeet the needs of a highly regulated organization. And the other way around – of course, forcing a solo developer to follow all these requirements may be beneficial, but in the end, it will generate a lot of administrative overhead and unnecessary costs. This is why it is important to understand your context, establish an appropriate security baseline, and enforce it consistently.
I agree with Gartner’s opinion on reasons for cloud security failures. Sometimes, the reason is in a resource created a long time ago with an outdated default configuration. Sometimes, the reason lies in a lack of understanding about potential risks. We always try to find out what the use case is and to suggest a solution that will be a golden means between security and usability.
If you want to start hardening your public cloud infrastructure, here is some advice:
- Understand your context.
- Stay up to date with the latest security baselines from your CSP (Cloud Services Provider) and try to follow them.
- Make sure that you fully understand the implications of your configurations.
- Ensure your services align with all relevant regulations. Build and enforce a secure foundation from the start – it’s much easier to do this before exposing it to users.
- Never rely on a single security feature. Build a multi-layered security strategy to protect your data from various threats.
Connect with the co-authors on LinkedIn!